Top Social

the world of funky templates

Image Slider

new mscraps releases 20/09

21/09/2013
This weekend I have for you  new ‘old’ releases at mscraps.
Working on these two packs was a pleasure.
Spring Carnival pack is a collab I made with Amy Martin some time ago. It’s such a  versatile pack as you may find some clean and simple templates and some more complicated ones. It only depends on you which one you’ll use.
No sweat is really easy to use pack. You just need to clip your favourite papers to all these funky shapes and add some elements. It’s that easy to create an original and outstanding page with this pack.

So here they are:


 and here are some pages from the team with NO SWEAT

 by Sucali
 by Raquel
 by Julia
 by Mary
 by Diane
and here goes some with Spring Carnival:

by Mary
 by Mary
 by Marnel
 by Diane
 by Mary
 by Sucali
have a nice weekend and thanks for stopping by!

Photography beyond portraits – Tips for taking LANDSCAPE photos

17/09/2013

As a portrait photographer, I’ve spent a lot of time honing in on my skills with people and portraits, but for my scrapbooks, I love to see where I’ve been and the interesting landscapes around me.  I’m lucky to have so much gorgeous scenery at my fingertips, living in Colorado.  Here are some tips for taking gorgeous landscape photos

Tip #1- Size does matter

As always, our main consideration when taking photos is light, and there are definitely some great shots that can be taken in low light, but, for the most part, you’ll be taking landscape shots between sunrise and sunset. So, that brings us to our specific considerations for landscape photography – focal length and depth of field.  For really great landscape photos, your best bet is to use your widest focal length.  Lenses are considered Wide Angle between the focal lengths less than 50mm.  The wider the better- even try a fisheye!  The other important consideration for taking landscape photos is aperture.  While you want a wider aperture (larger opening) for portraits, you want to close down for landscapes.  The smaller the aperture, the larger the depth of field you’ll achieve, meaning that more will be in focus.  


Tip #2 – Watch your horizon

I’m very OCD about tilts in general, but especially when I can see the horizon.  The horizon should be straight!   

Also…watch for other leading lines.  Make them your best friend and draw your audience in.  I love repetitive lines and always try to position myself to take the shot from the angle I want to draw the viewer’s eye into the interior of the photo, as opposed to off the page.  Drawing the eye out of the photo and onto the page of your scrapbook is a fun idea as well, but just make sure you’re aware of what look you’re intending.

Tip #3- Watch your foreground

When using a wider angle and a larger depth of field, you’ll see what is in the foreground.  Look for interesting ways to frame your shots.  Recently, I’ve come to love my Lensbaby Composer Pro for landscapes as well.  Anything fun and unique and you’ll make your pages sparkle!

Tip #4- LOOK UP!

Look up, look down, look all around you. Many times the scenery around us is even more beautiful from unusual angles.  Grab the details or go minimalistic.  Tell a story with your photos.


To scrap my recent hiking trip in Breckenridge, I used the Happiness Loves Company templates from Jimbo Jambo Designs and One Little Bird's Trailblazer kit.


new release - Break the Ice

14/09/2013

The weekend means new releases in my both shops – DSB and mscrap. I’m trying to catch up with my mscrap shop and still adding some older releases already available at my DSB shop. It means you can still get some of the pack at the special price each week.

This week I have for you a pack called BREAK THE ICE.

Why did I chose this name? Some people are a bit afraid of the templates that take up the whole page. They got used to small – clean and simple pages. I felt this way some time ago but I wanted to get out of my comfort zone and started experimenting and I’m so glad I did! Big templates still can look clean and elegant, it only depends on you how you use them. You always can delete some parts or change the opacity of the layers. This pack is really versatile. All templates are big but the style of each one is really different so you may try different techniques on each one. Just try it and have fun, experiment with papers and it’s opacity, change the shadows and I’m sure the effect will be stunning. You will find below some pages from the team that hopefully can inspire you. I would love to see what you achieved so be sure to contact me and show me your pages.

Ok I leave you with the pack and some great pages:


and here are some pages from the team:

 by Diane
 by Diane
 by sucali
 by Mary
 by mrphoto
 by MissK
 by Mary


For those of you who haven’t seen JJD facebook fan page here are the new mscraps releases:


thanks for stopping by and have a nice weekend
 

Focus on Photography - ROCK your cell phone camera

10/09/2013

One of the greatest things invented is the Smart phone.  A phone, computer and camera all in one – what more could we ask for?  Now we can take photos any time, all the time.   The only disadvantage to the cell phone camera is the quality.  The Nokia Lumia 1020 – the cell phone with a 41 megapixel camera, may change all of that, but for now, you’re not likely to get professional grade quality from your cell phone, but then you’re likely using it to capture everyday moments and not poster-sized canvases.

I love my cell iPhone 4s.  I never leave home without it and I love that I can always have photos without taking my dSLR everywhere.  This year, I’ve made a point to learn to use the camera better and play around with editing the photos.  This week, I’d like to share some tips to really rock your cell phone 
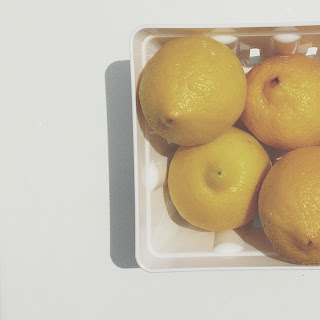
camera.  All of the photos in this post were taken with my iPhone 4s.

Tip #1- Light

Once again, our main consideration when taking photos is light.  Cell phone cameras really need a lot of light.  They do not work well at all in the dark and the LED light makes a better flashlight than flash, but it’s better than nothing, so we make the best of it.  I usually turn mine off.  I know I run the risk of camera motion, but I try to hold as still as possible.  This is also a good time to mention that the front camera (at least on the iPhone) is much worse in quality than back camera.


Tip #2 – Watch your background

As with any photo, pay attention to what is in the background.  Avoid clutter or objects coming out of people’s heads.  Ok, realistically, it's unavoidable to catch the right moment at the right time without also grabbing some background.  That's where editing can play an important role in your shots.  Other times, it's easy to set up a shot just the way you want.  Also, watch the horizon. The world might not be flat, but it should look like it is in photos.  We don't want anyone sliding off the edge of the world!  ;)


Tip #3- Editing apps

It’s very rare these days to see any photo that hasn’t been edited to some extent.  There are endless apps out there for editing photos, from free to quite a few dollars.  I don’t have all of them, so I’ll share a few of my favorites.

A.     Editing apps
a.     Snapseed – Full control of brightness, contrast, color and even some special effects.  I love this app for great all-purpose clean editing.
b.     VSCOcam – If you like the VSCOcam presets or just want to try something new, then you’ll love this app.  Perfect black and white images with one click.  I've also become quite fond of the "faded and moody" set (T1-3).

Edited with VSCOcam
c.      BigLens – add some depth of field and bokeh as if you took a shot with a wide aperture.
Edited with BigLens
d.     PicTapGo – From the makers of the totally RAD actions – find popular combinations or create your own.
e.     Picfx – Edit with fun presets, including light, textures and frames.
Edited with Picfx

Word art by Rhonna Designs
B.     Presentation
a.     PicFrame – Put multiple pictures together to make a collage.
b.     Line camera – Add cute little doodles to your photos.
c.      Over – Add text and doodle overlays.
d.     Beautiful Mess - Add text and doodle overlays.
e.     Rhonna designs – virtual scrapbook pages right at your fingertips.


 C.     Posting
a.     Instagram
b.     InstaWeather
c.      InstaFood
d.     InstaQuote, 
e.   InstaETC…Yes, I'm kidding about that one, bu there seems to be a ton of apps for posting any category you can imagine.
D.    Other
a.     Photo365 – one of my favorite ways to remember when photos are taken and perfect for Project Life!
b.     Photosynth – Create amazing, 3D panoramic images.
c.      Skitch – draw your own doodles for fun or add them to photos.


Tip #4- Accessorize!

macro attachment used
A.     Lens attachements - I have the ones from PhotoJoJo, but I’ve heard good things about the Olio Clip ones as well.  The set includes a telephoto lens, wide angle lens, and a macro.


waterproof case by DriSuit


  B.     Weather proof case -  Take your cell hone to the beach or underwater without worrying about the sand or water damage.  I have one from DriSuit.

  C.     Tripod – can you beleive the make little tripods for cell phones?  How fun!


Tip #5 – HAVE FUN!

My favorite tip is to always remind you to have fun.  Enjoy what you’re doing and the memories you’re capturing.  Remember that the whole reason we scrapbook is to remember the times that pass us so quickly…so make sure you enjoy them!

Here is a LO I did with a photo from my cell phone.  I used the Jimbo Jambo template Party Piece and papers and elements from How it Began by One Little Bird, and the quote bubble from His & Hers by Paislee Press.


Auto Post Signature

Auto Post  Signature